I have finally set up my sewing machine in a permanent location where I can, on a whim, “whip something up” (and just in case you don’t understand why that would be in quotations, it’s because everything always takes longer than I think OR I decide to go wild and add a bunch of stuff to it).
The past couple of weeks I started sewing again! It’s mainly due to my craft room finally getting set up, which I’ll have to write a separate post about when it’s all done. I’ve been making crochet project bags, a little quilt for my youngest, a quilted pin cushion, and yesterday I made a heating pad and cover.
Honestly I had cramps and my heating pad I had for years sprung a leak and got blue gunk everywhere. I was looking at them online and of course thought “I could make one of those!”. I then thought I could make a heart shape one that would lay perfectly, right where I wanted it! This was one of those one-thing-lead-to-another-scenarios, lol! And be forewarned, I hadn’t planned on writing out a tutorial so this is more of a “how I did it”.
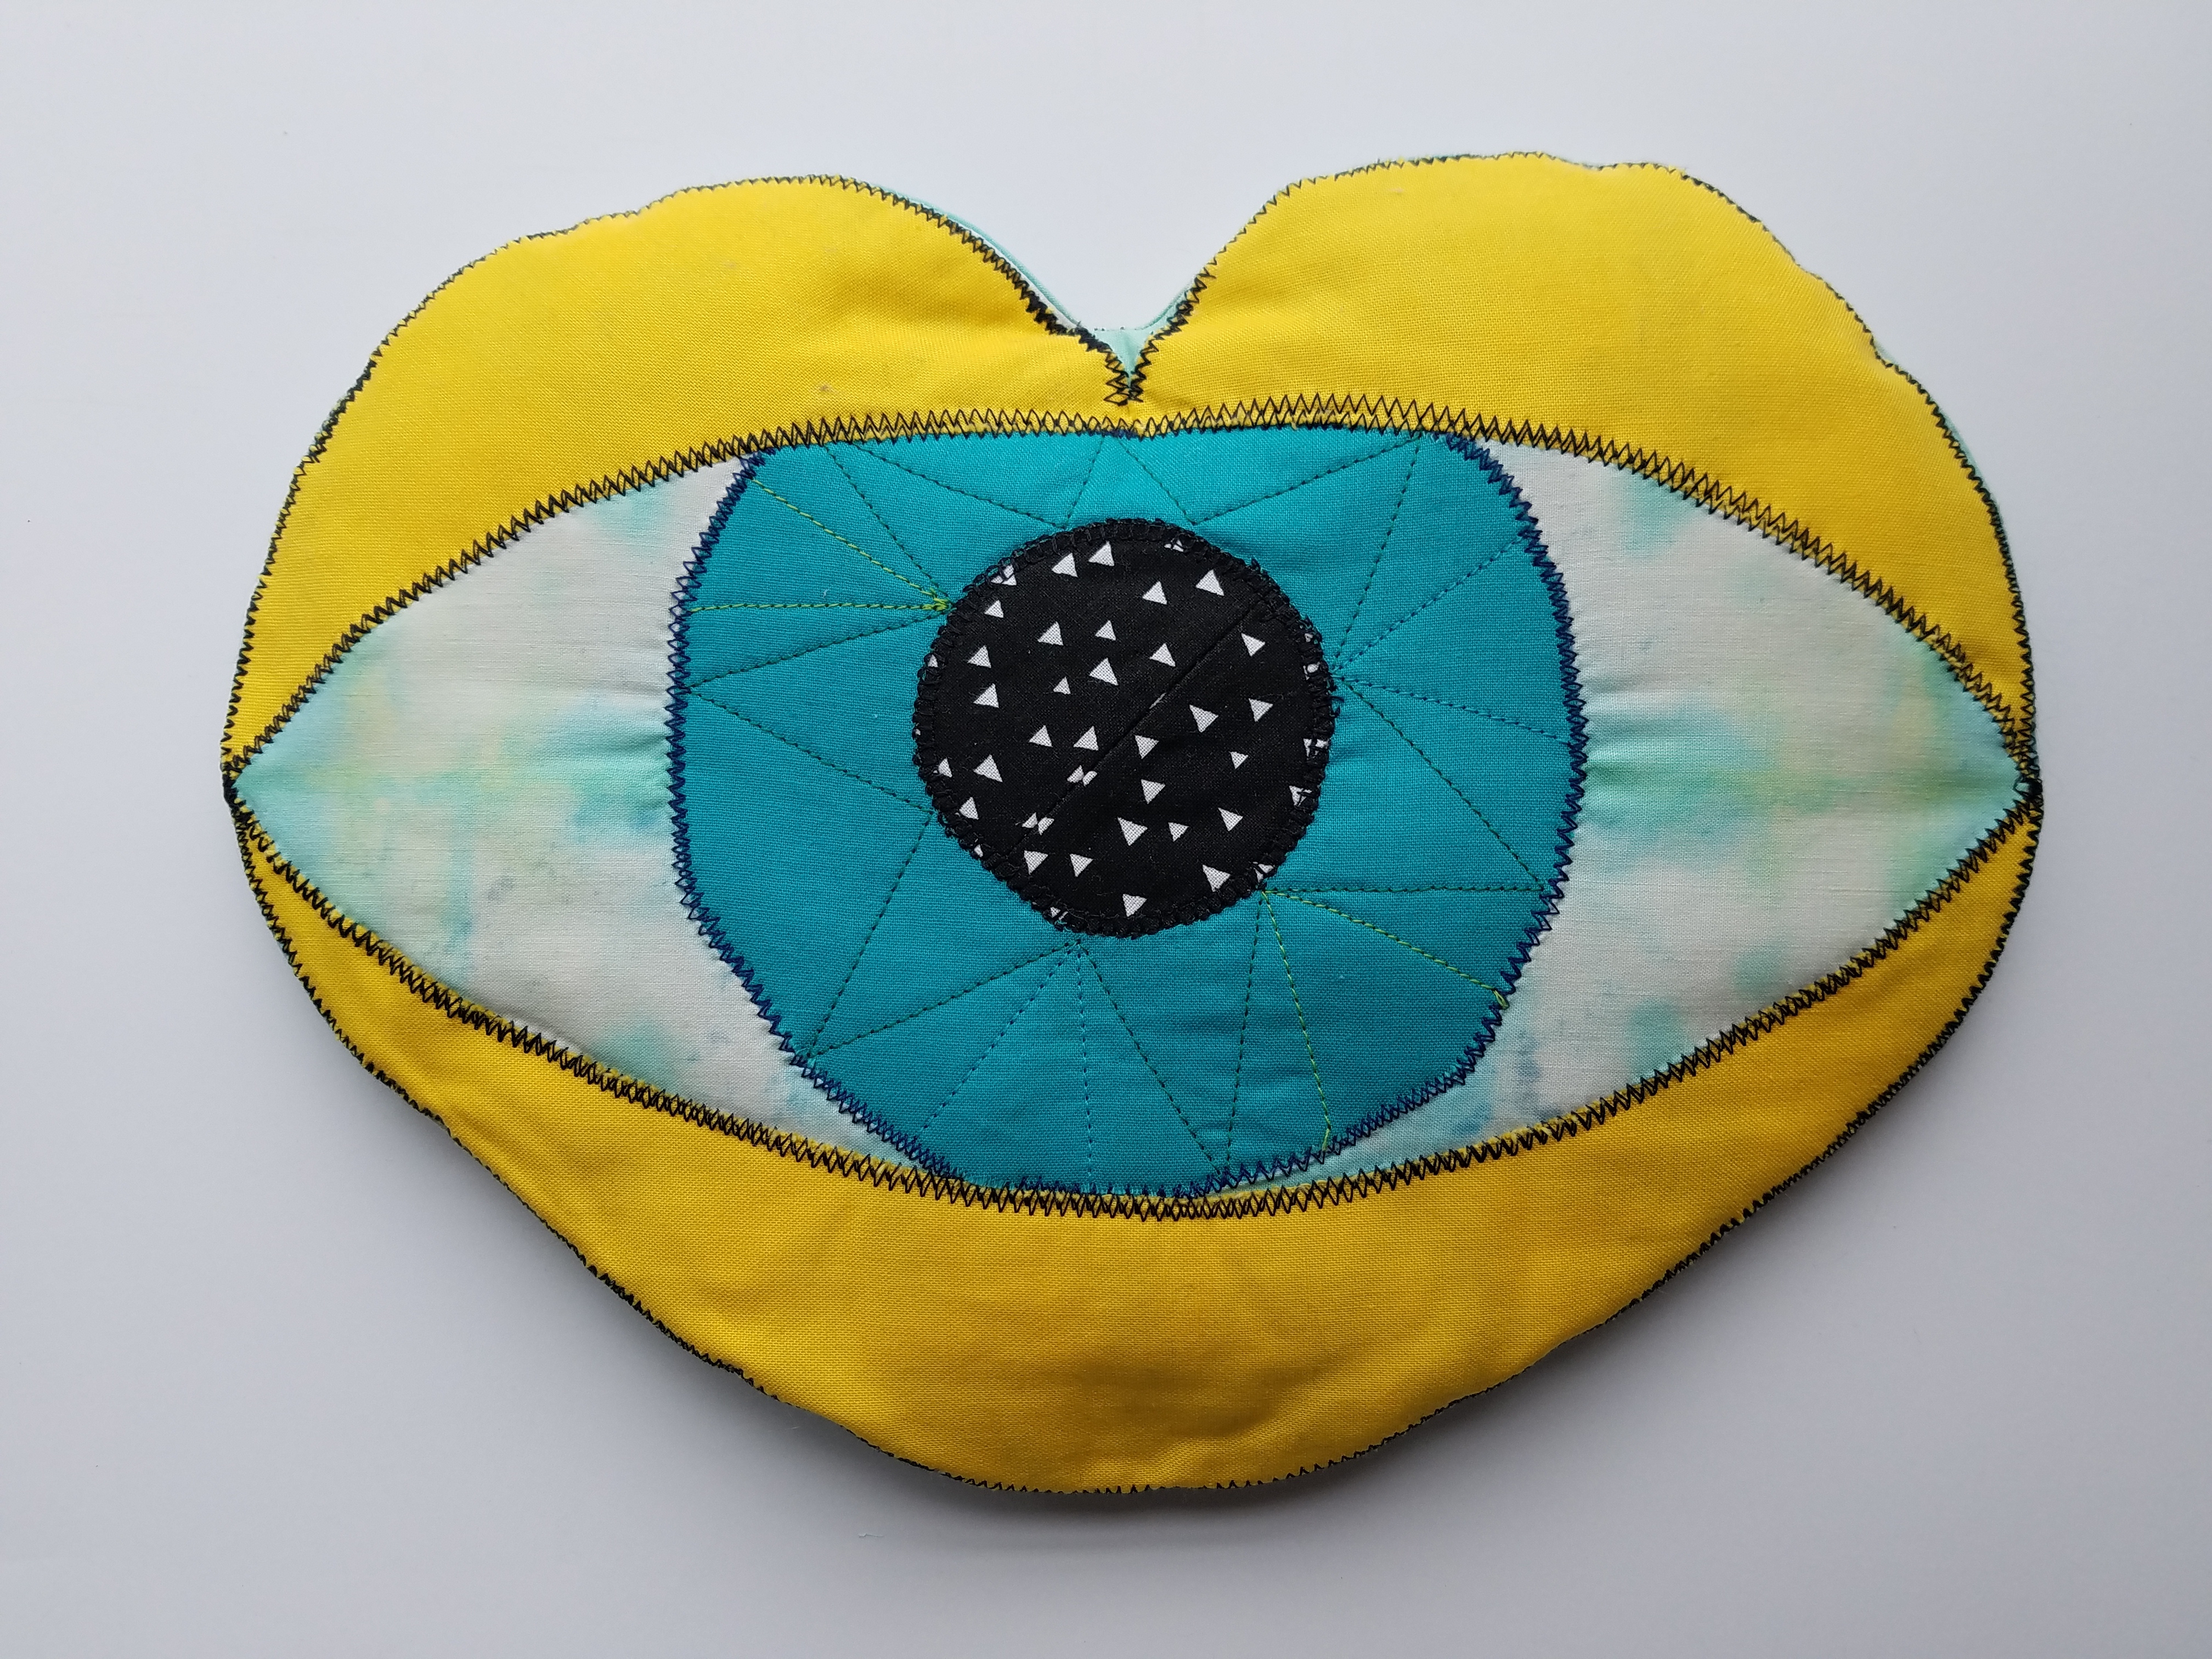
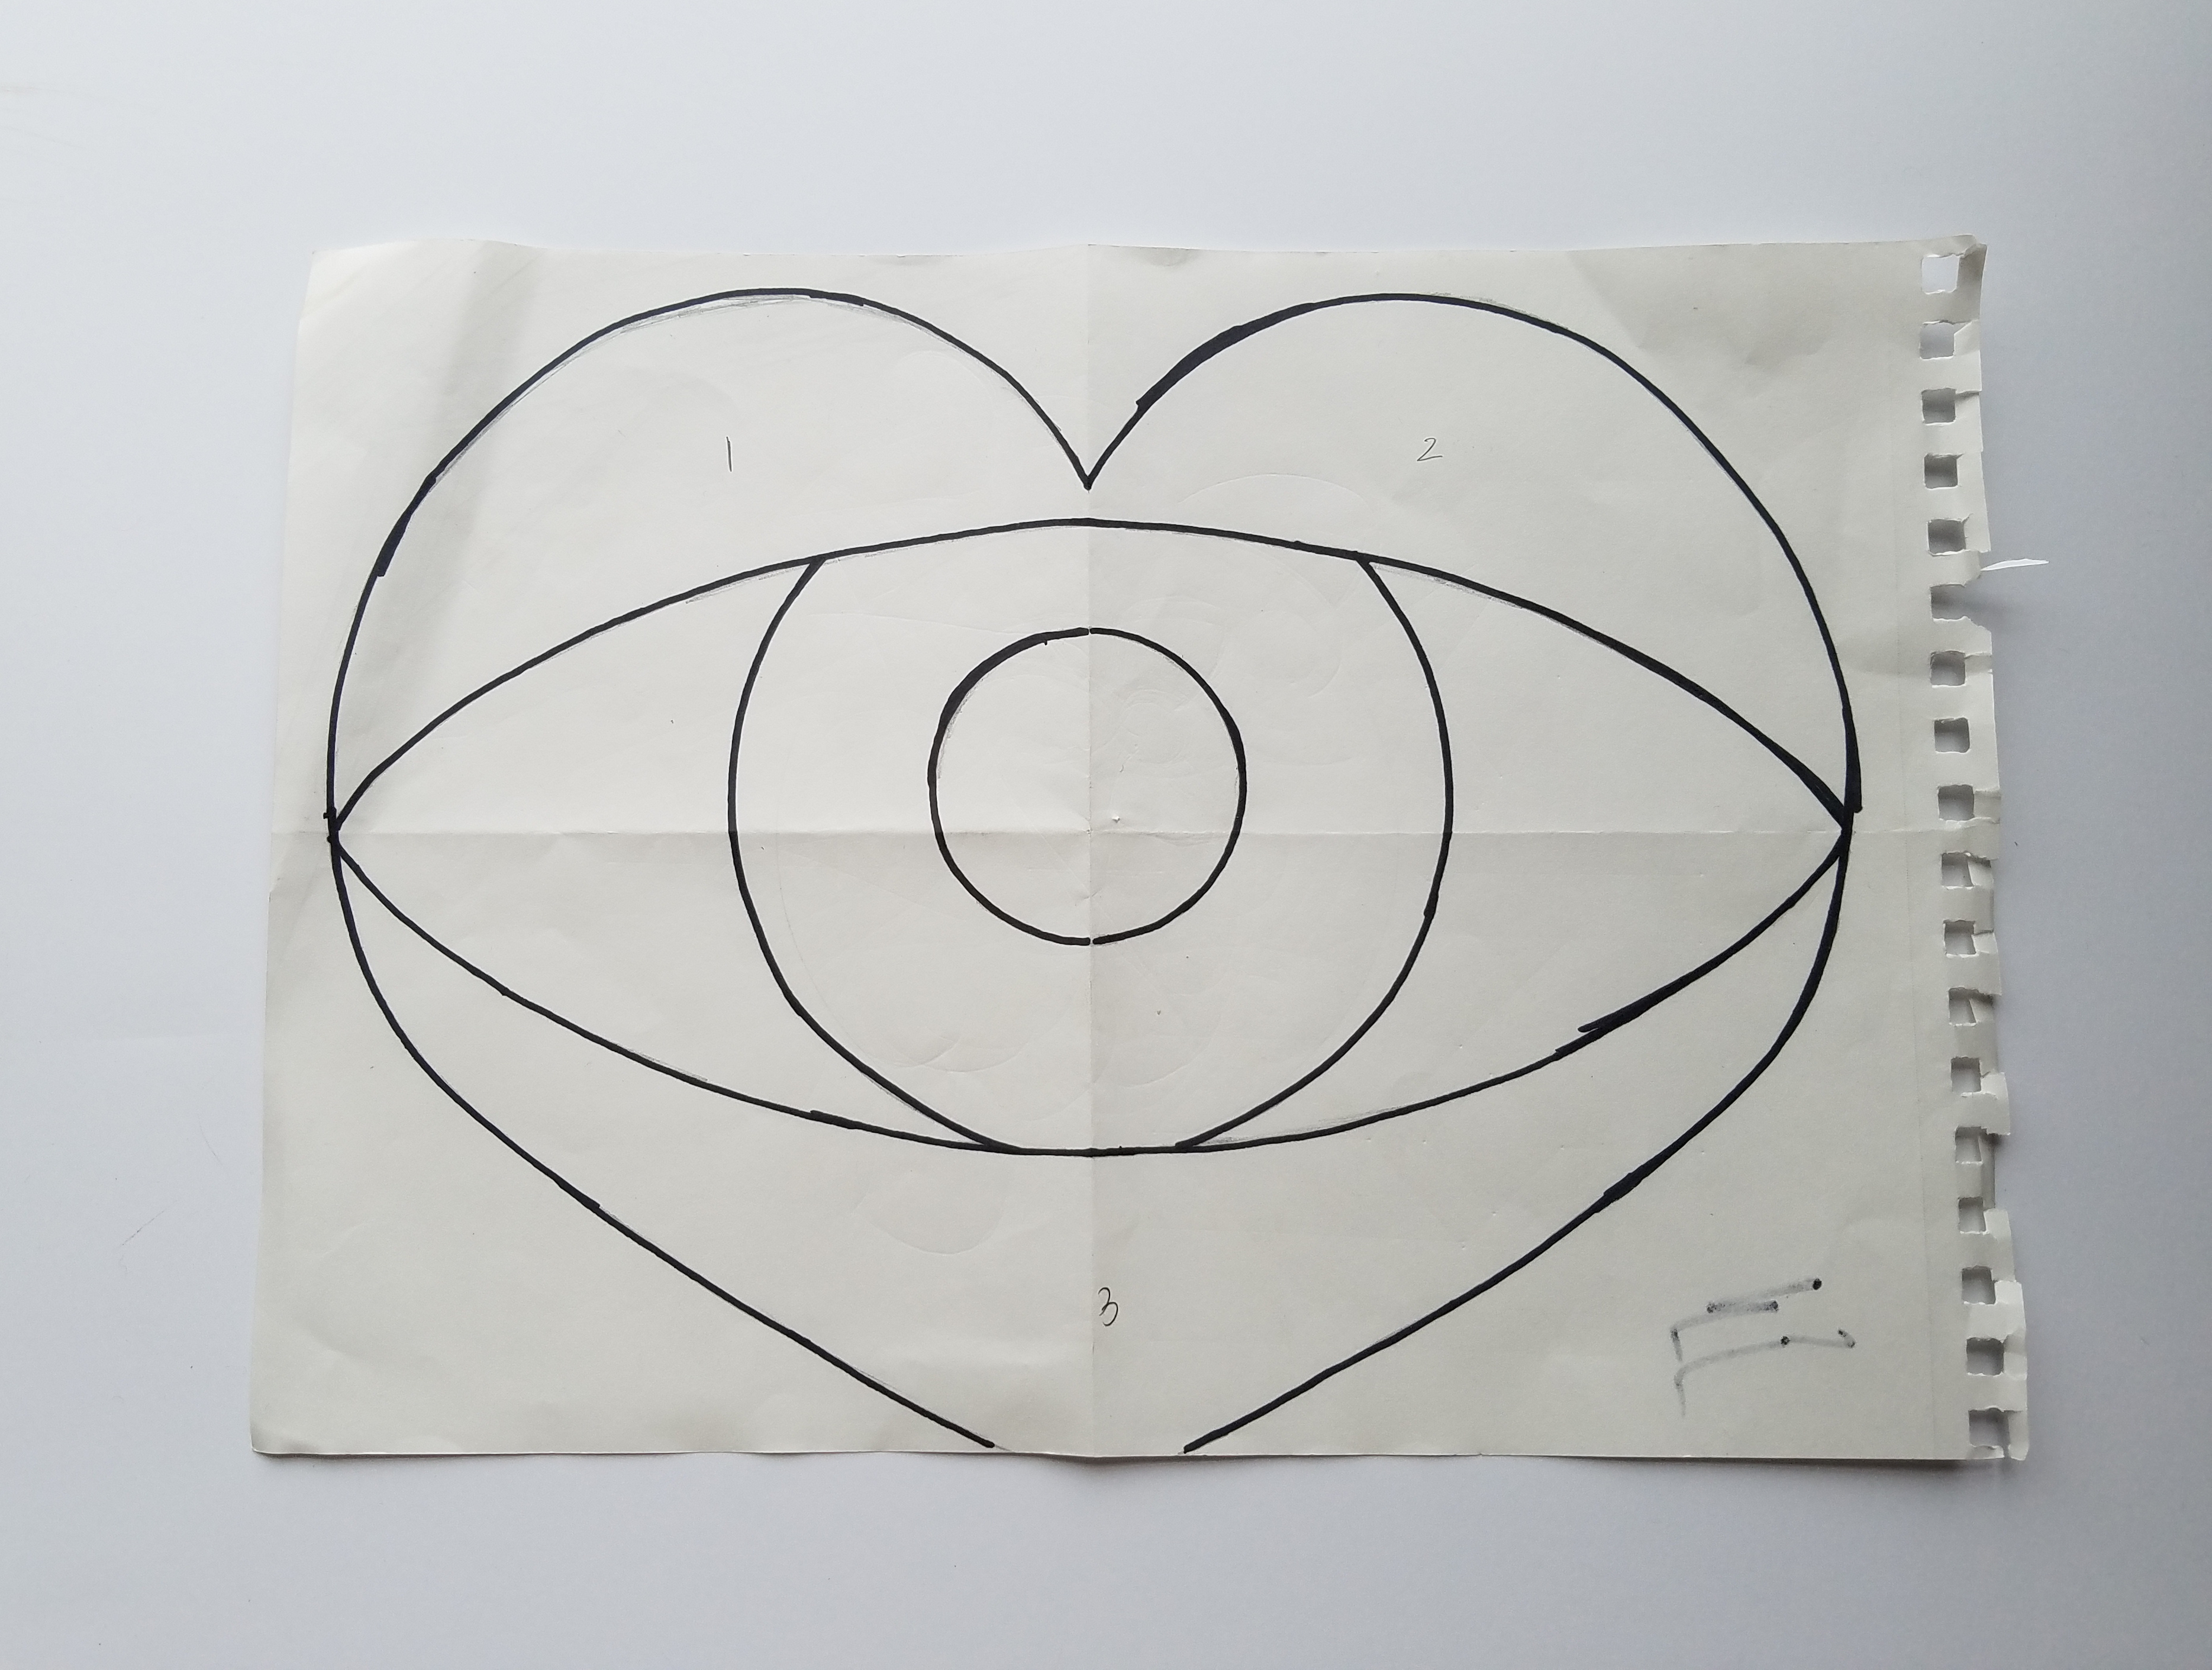
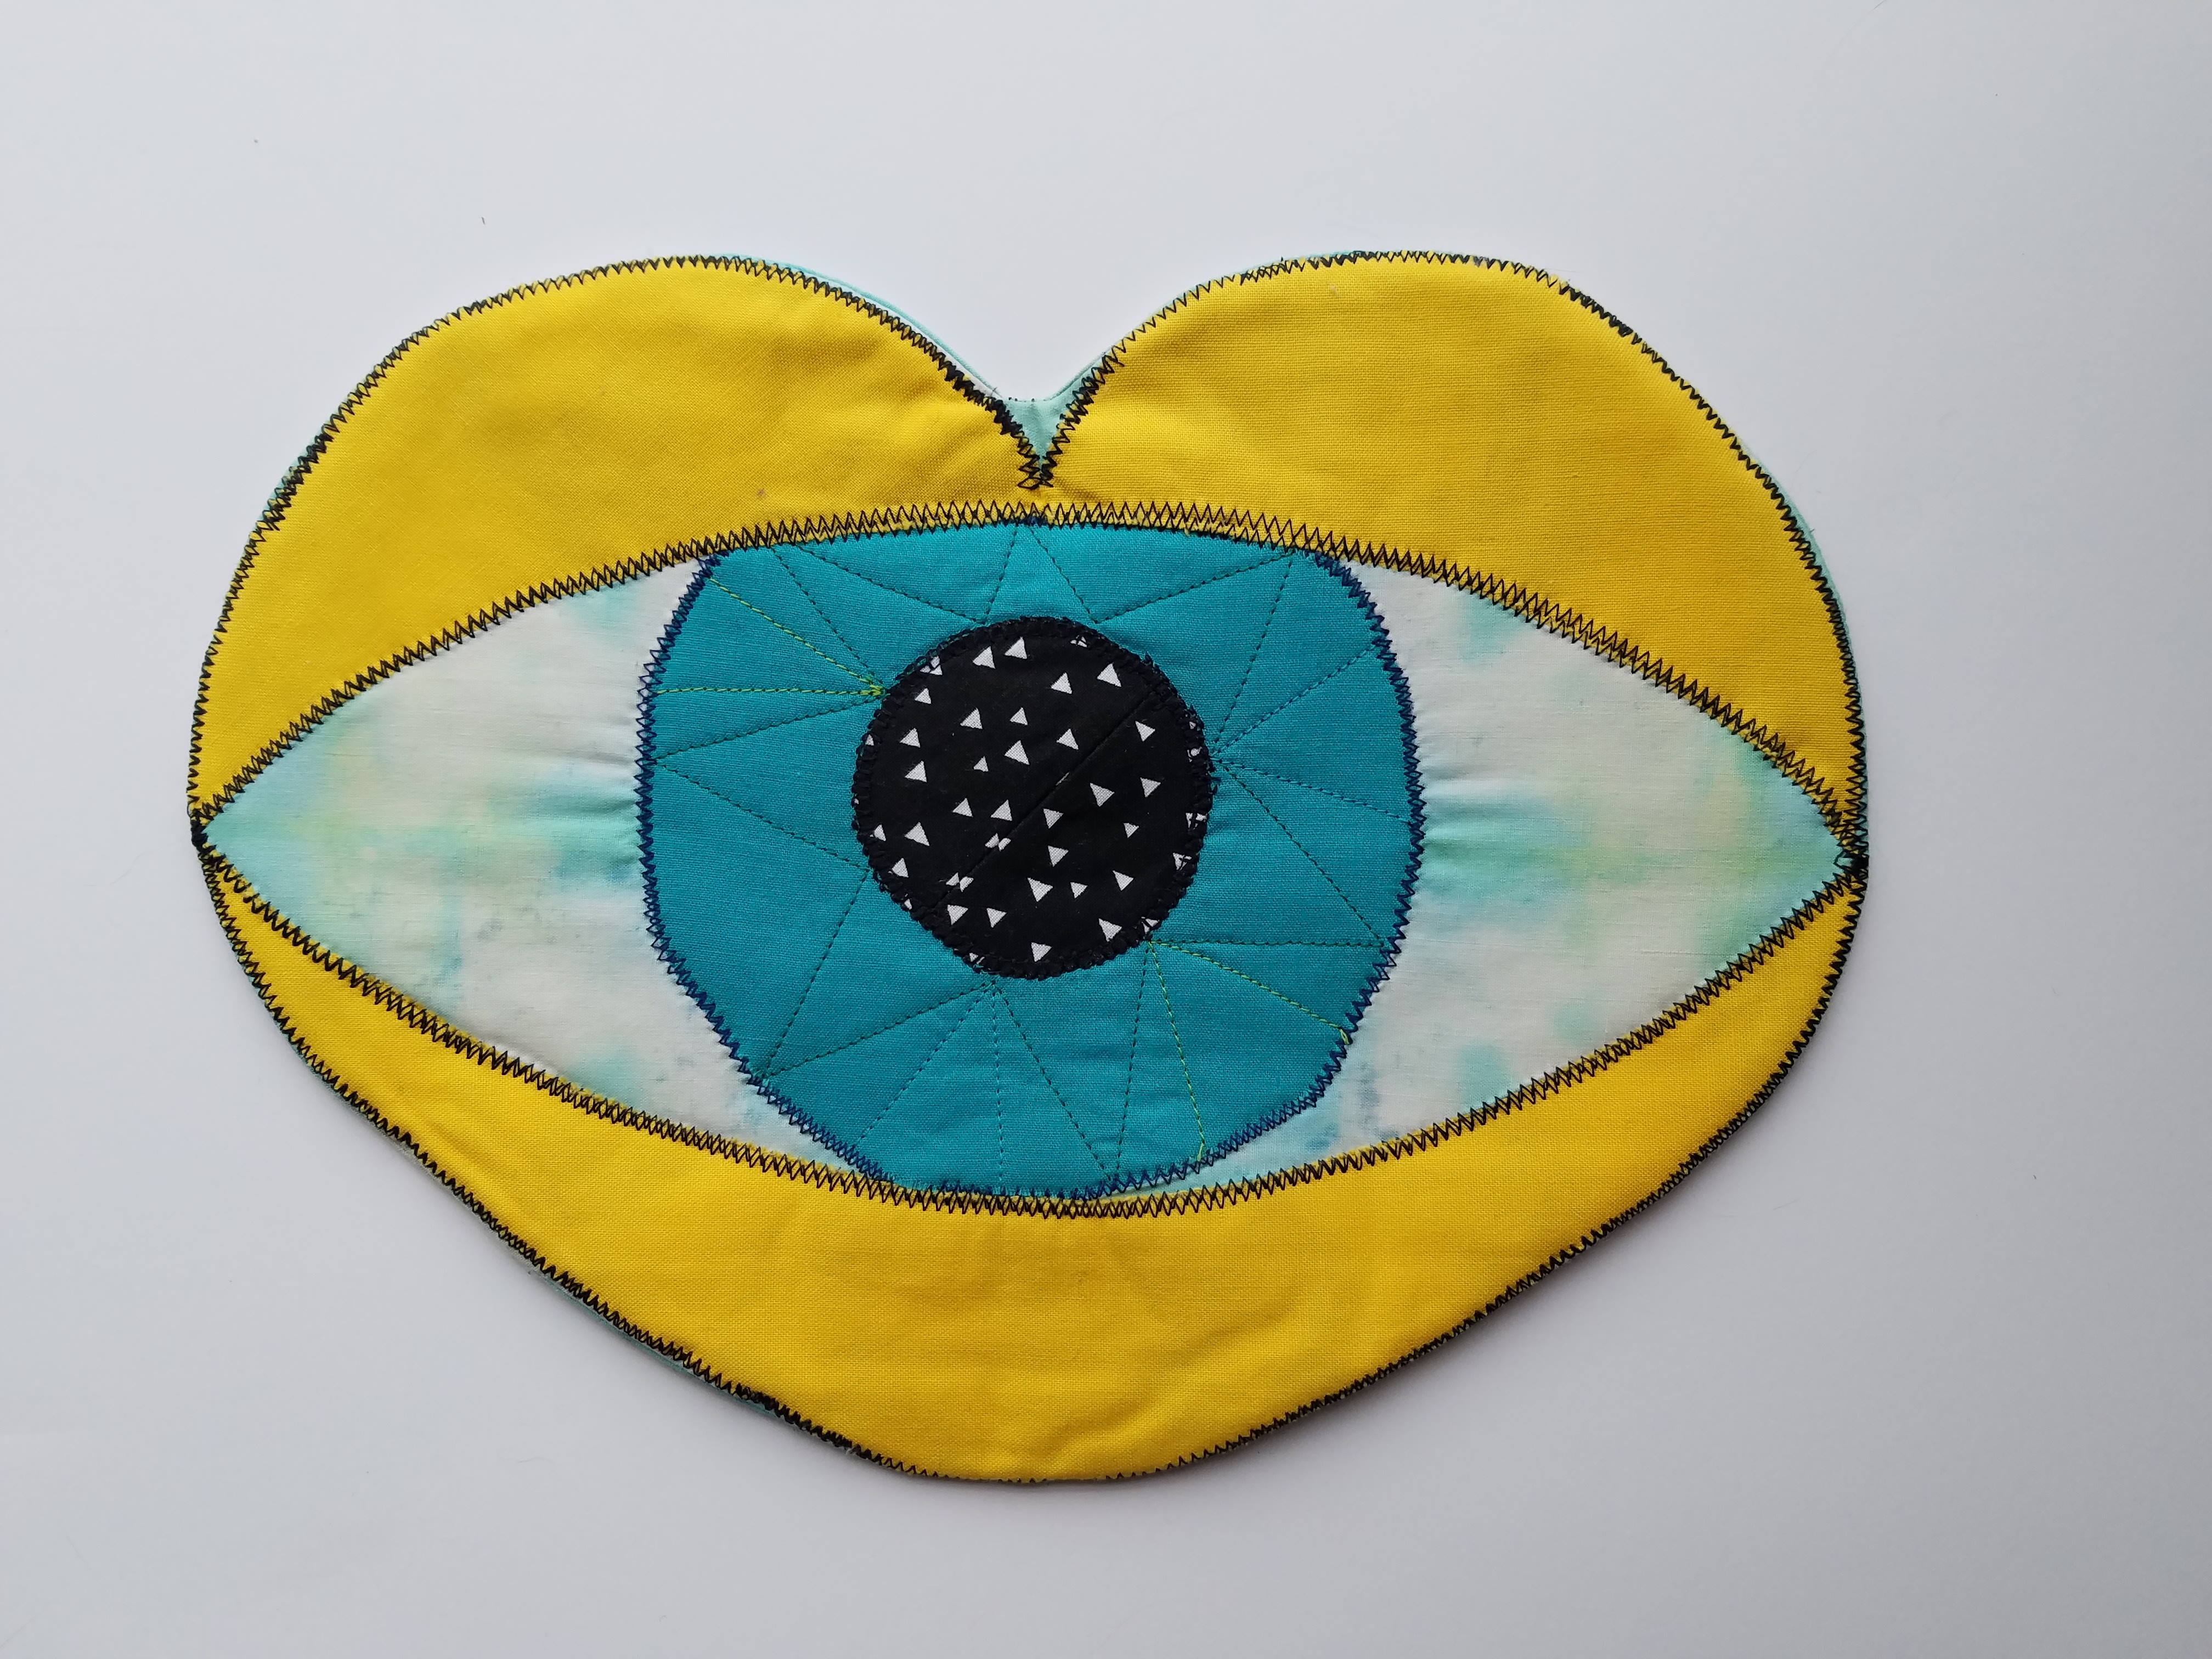
First I measured how big I wanted it, about 12″ x 8″, then I drew out a heart. At that point I decided to draw on an eyeball, just to see how it looked (cause for some reason I make eyeballs out of everything).
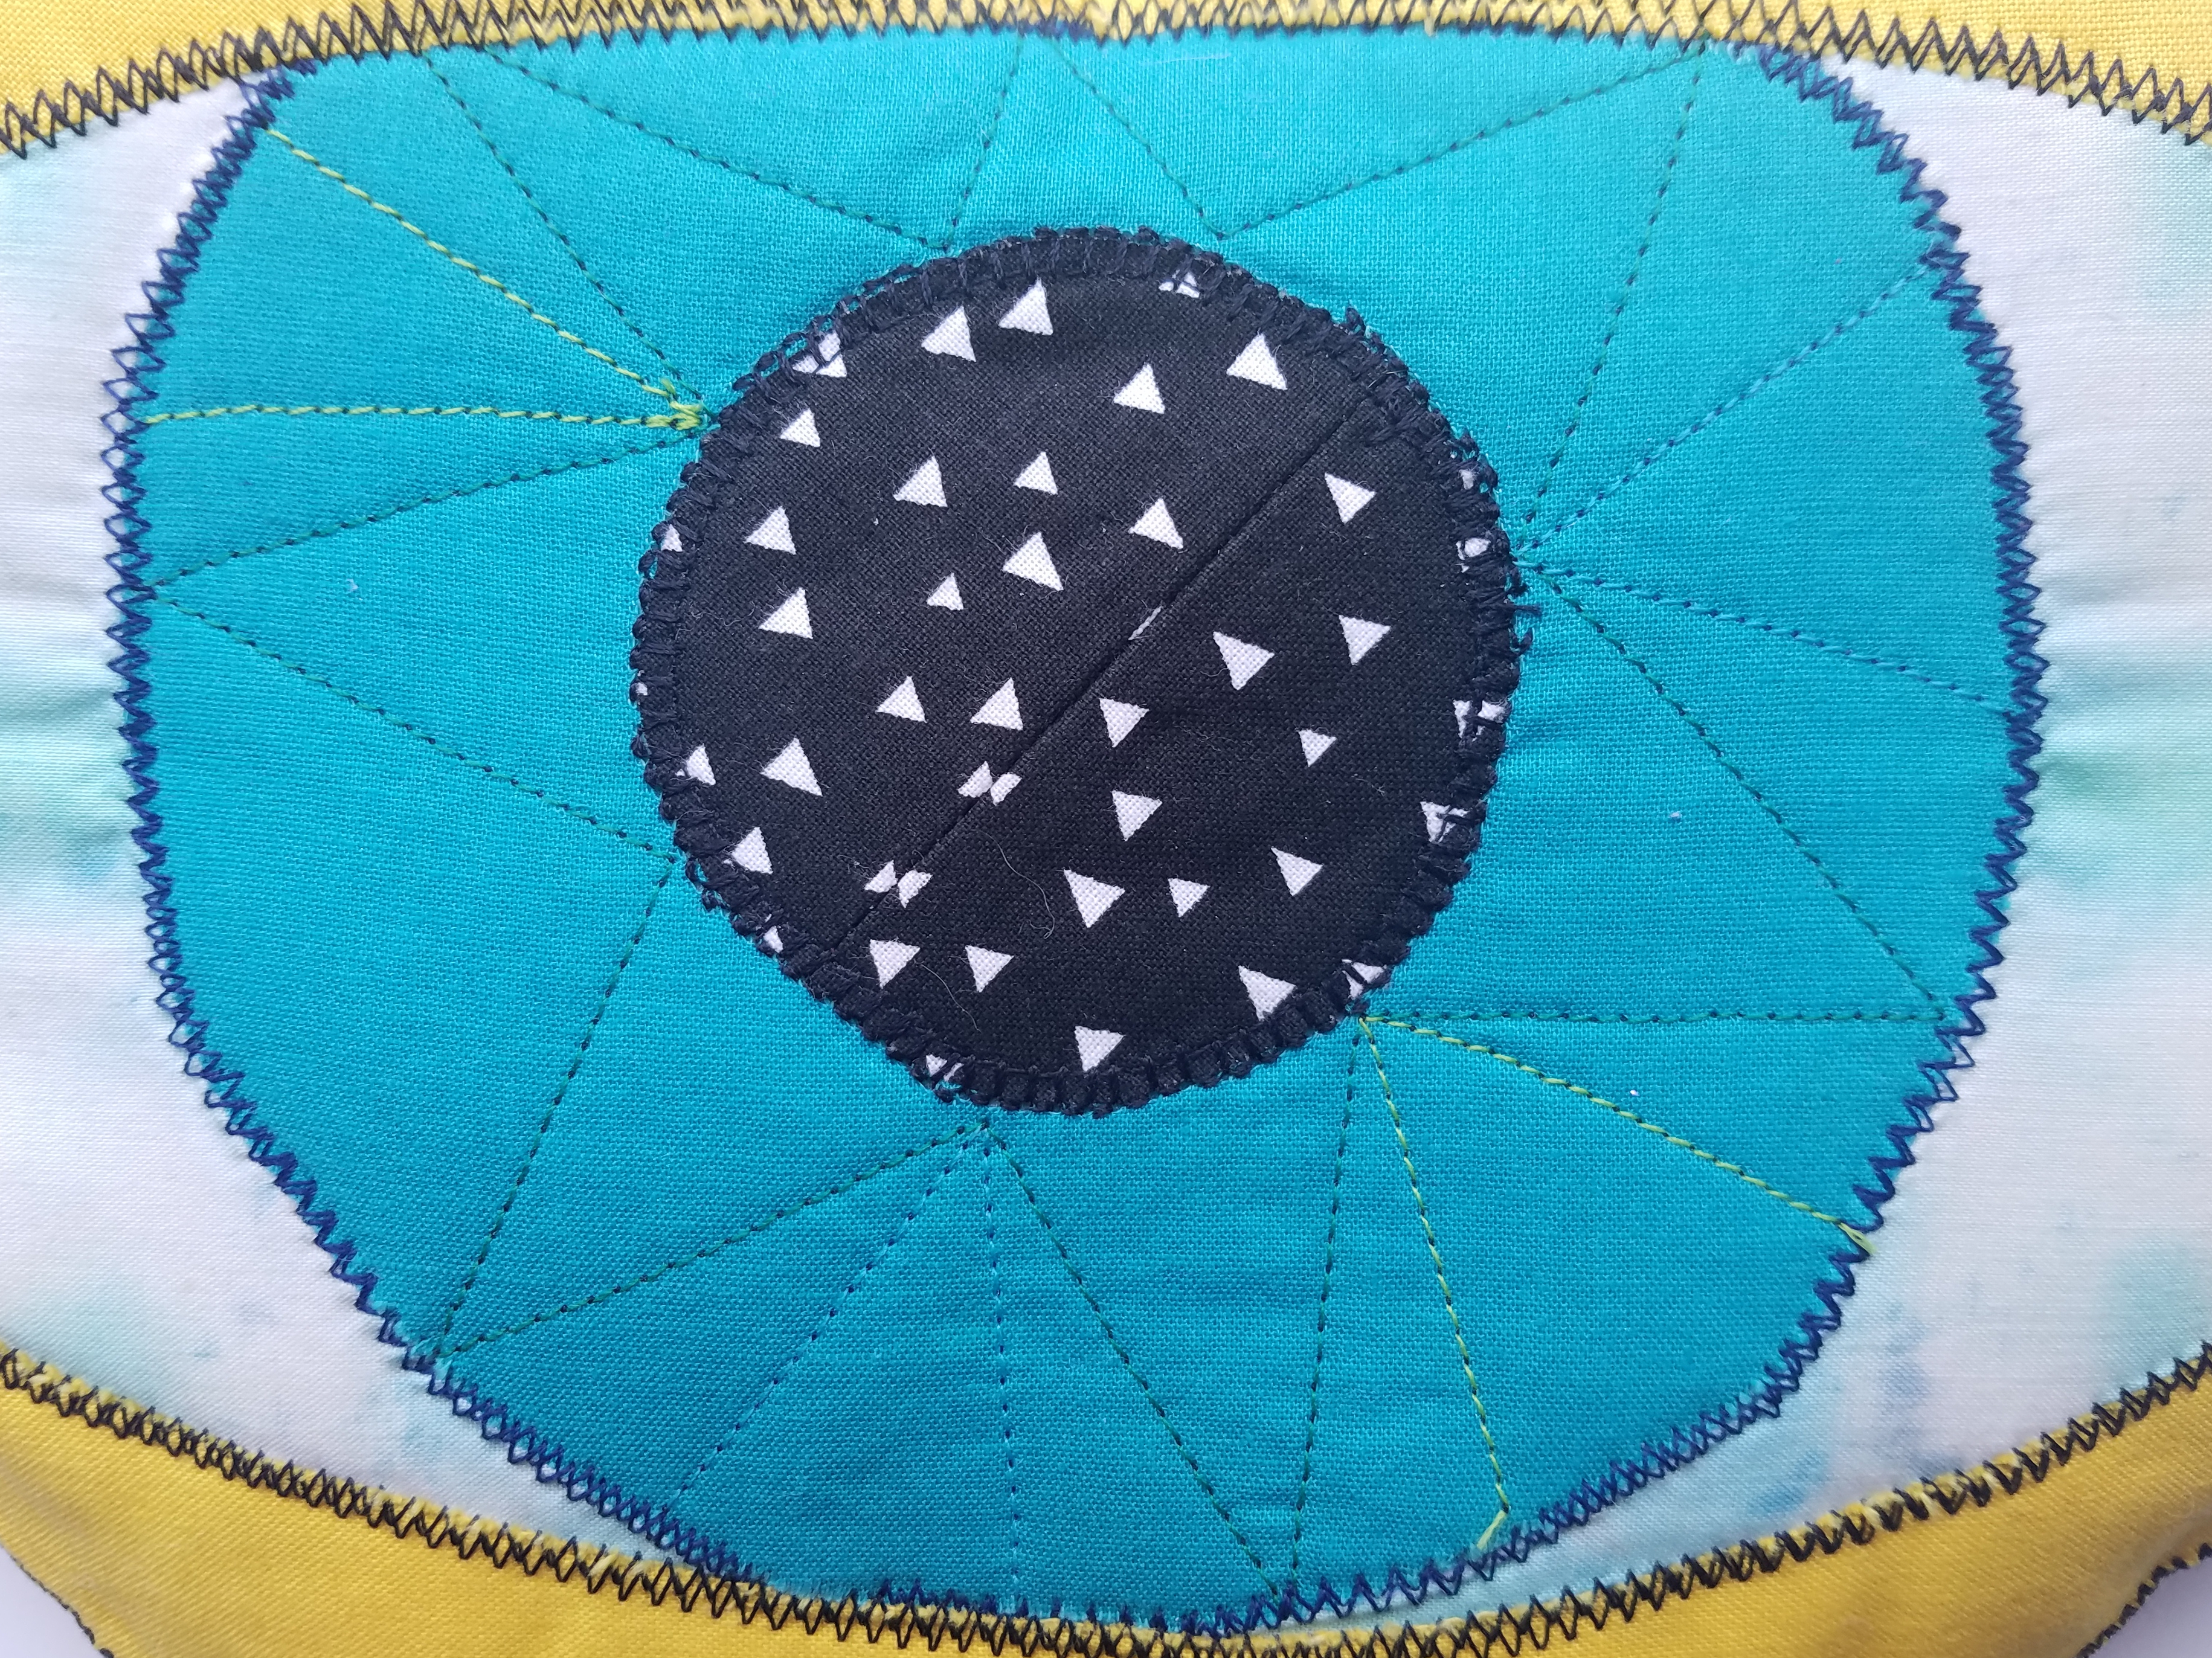
I liked it so proceeded to decide how to actually make it. I sorted through my fabric scraps and came across these colors I had left over from the crochet project bags plus some old cut up sheet fabric I had tie dyed a year or two ago. I decided to try just cutting out the heart and the pupil and iris and then sew it to the tie dyed fabric before I cut that to shape. I started by sewing the pupil onto the iris by zigzag stitching all the way around (I believe this is called applique). I wanted the iris to stick out a bit more so I found some small pieces of fusible batting and ironed it onto the back of the iris. I then chose different colors of thread and sewed triangle like shapes in the iris.
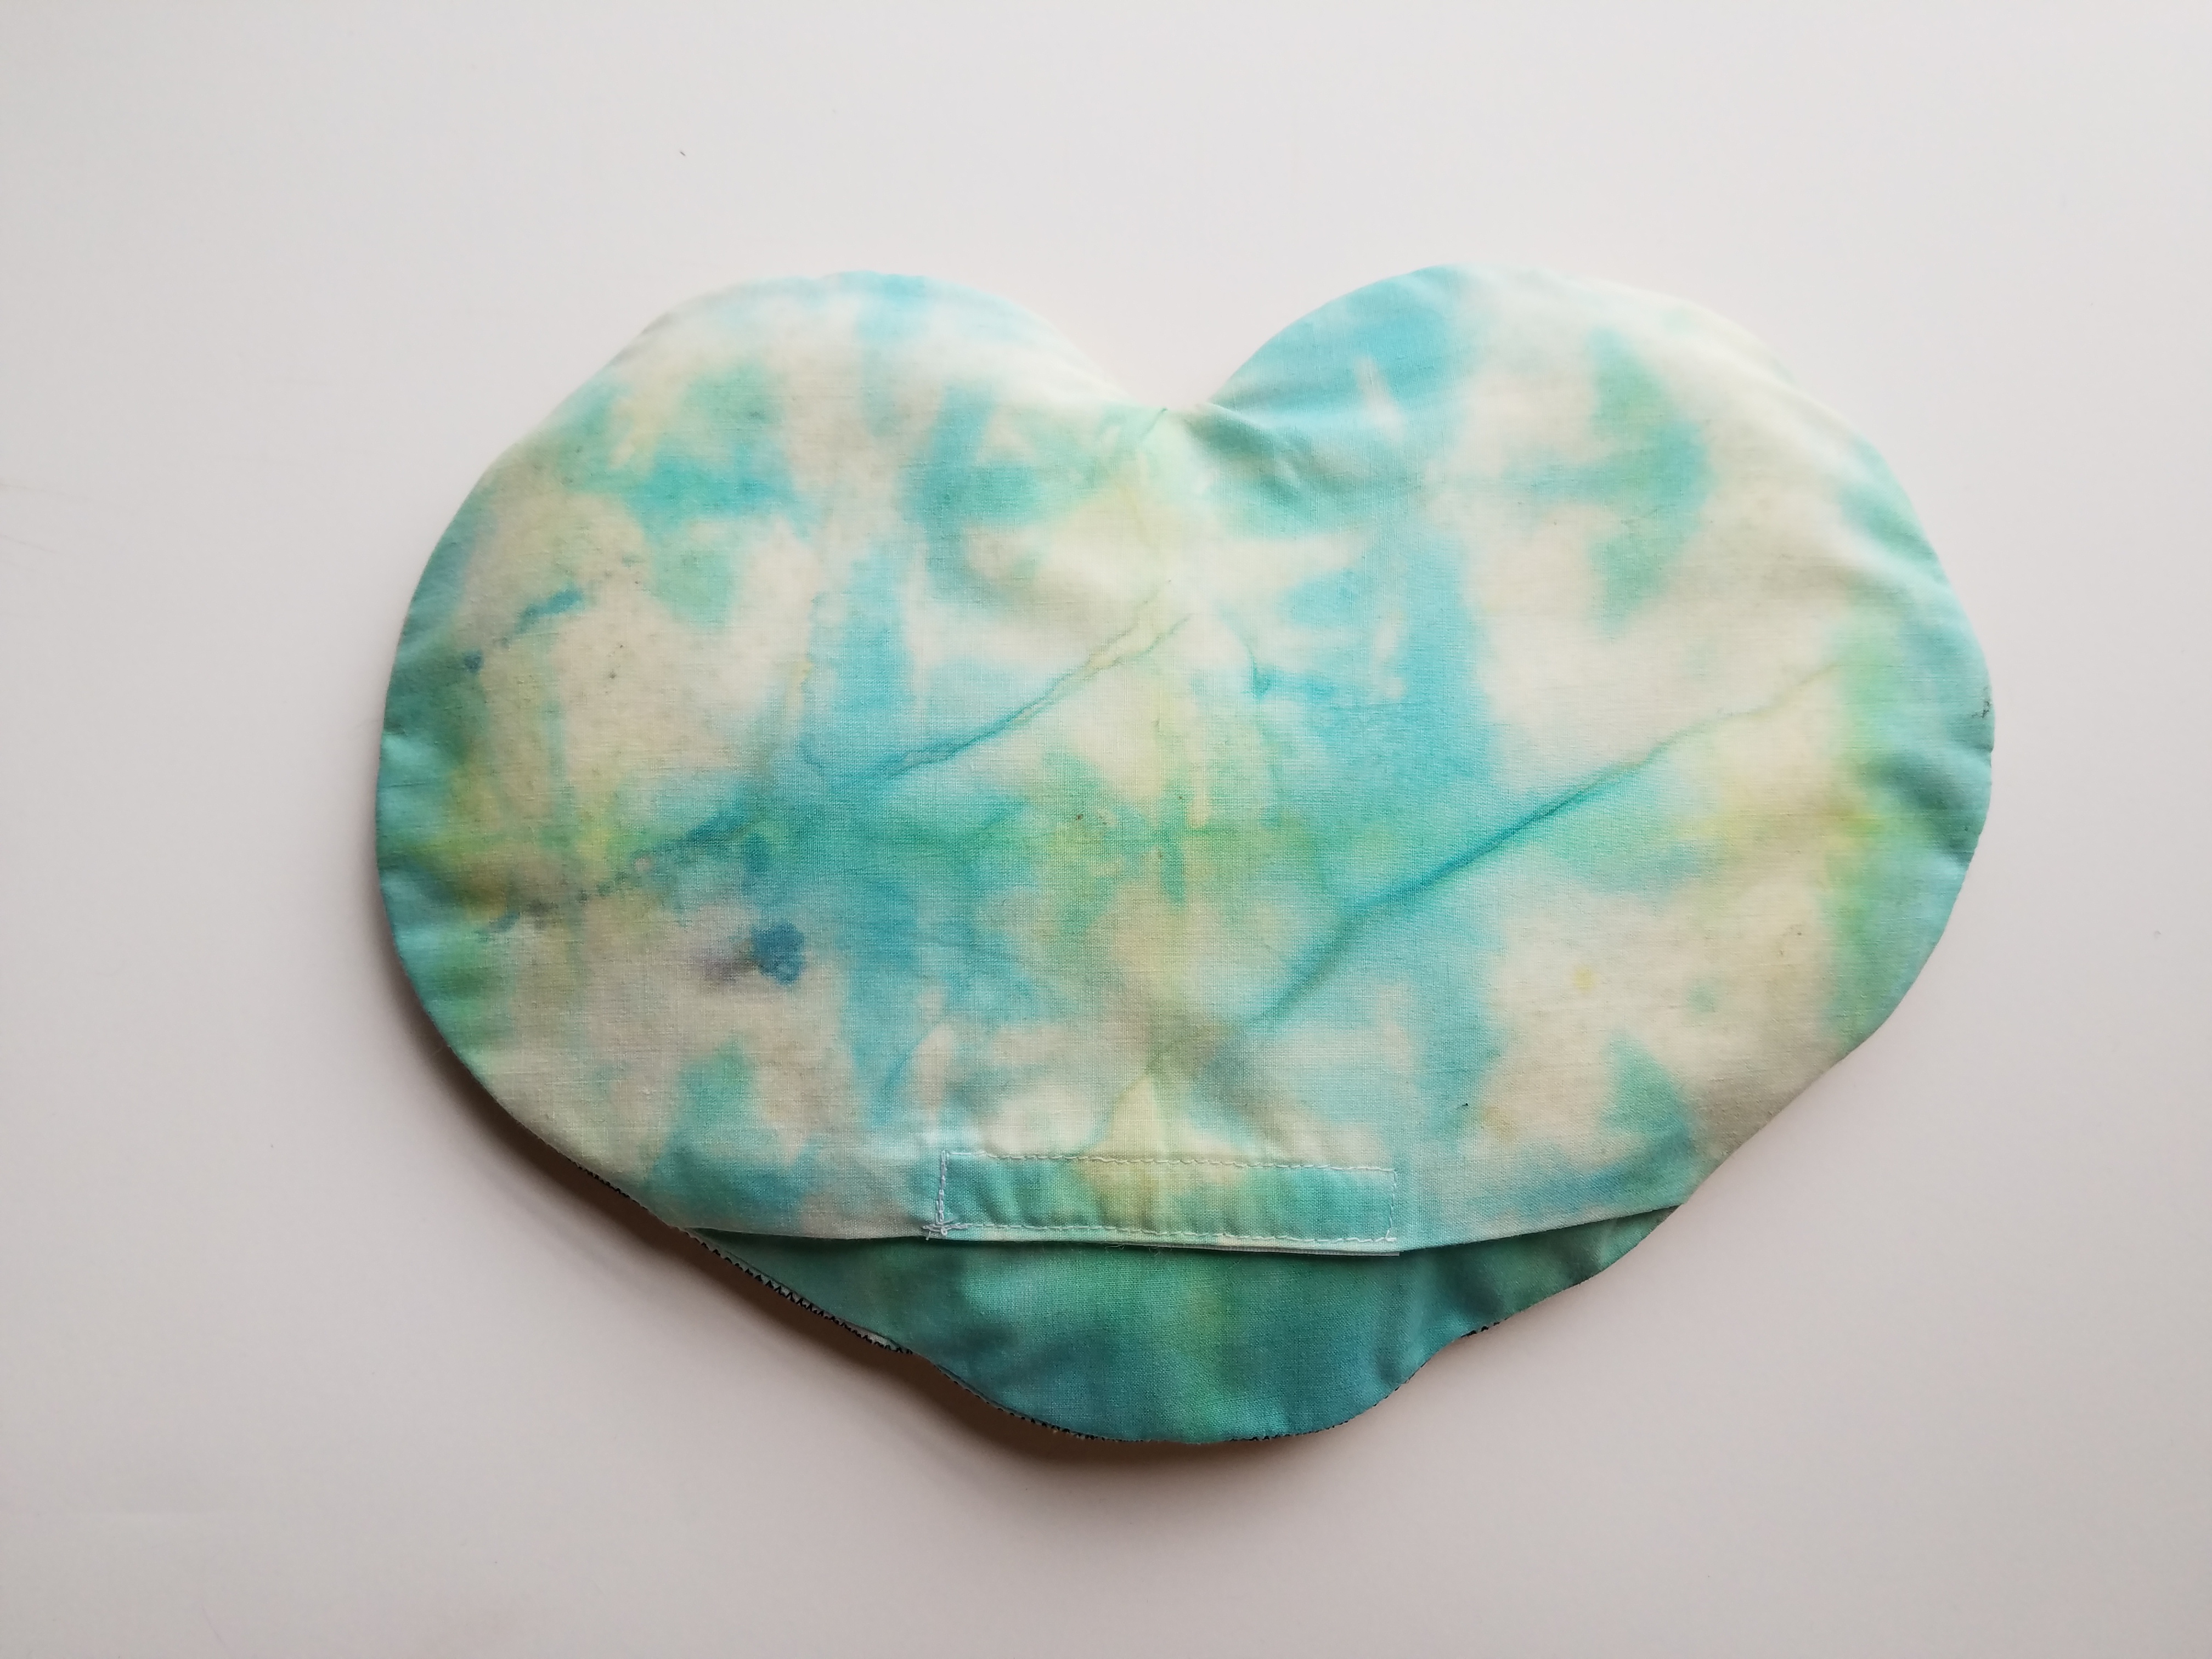
 I decided to use more fusible batting and put that on the back of the tie dyed fabric (ironing it on). I placed the iris and the yellow heart pieces to see where I wanted them, it was a bit of a tight fit with my back ground fabric but I made it work. I then pinned the iris in place and zigzag stitched around the edge, going around twice. I placed the yellow heart pieces and pinned them in place and then zigzag stitched around all the pieces twice, sometimes a bit more in places to secure the heart. I then cut out the heart leaving about 3/8″ of the fabric from the stitches on the outside of the heart. I placed this piece (rightsides together) on the back fabric. This is where I realized I wanted to make a envelope style back so I could take the inner heat pad put if I needed to. My fabric was not long enough for me to do this in one piece so I had to wing it. I might not be the best at describing how to do this so here is a link to a tutorial on envelope closures. After I put together the pieces for the envelope back I laid everything together (right sides facing each other) and pinned them in place, then I sewed around the whole thing making sure to back stitch to secure the thread.
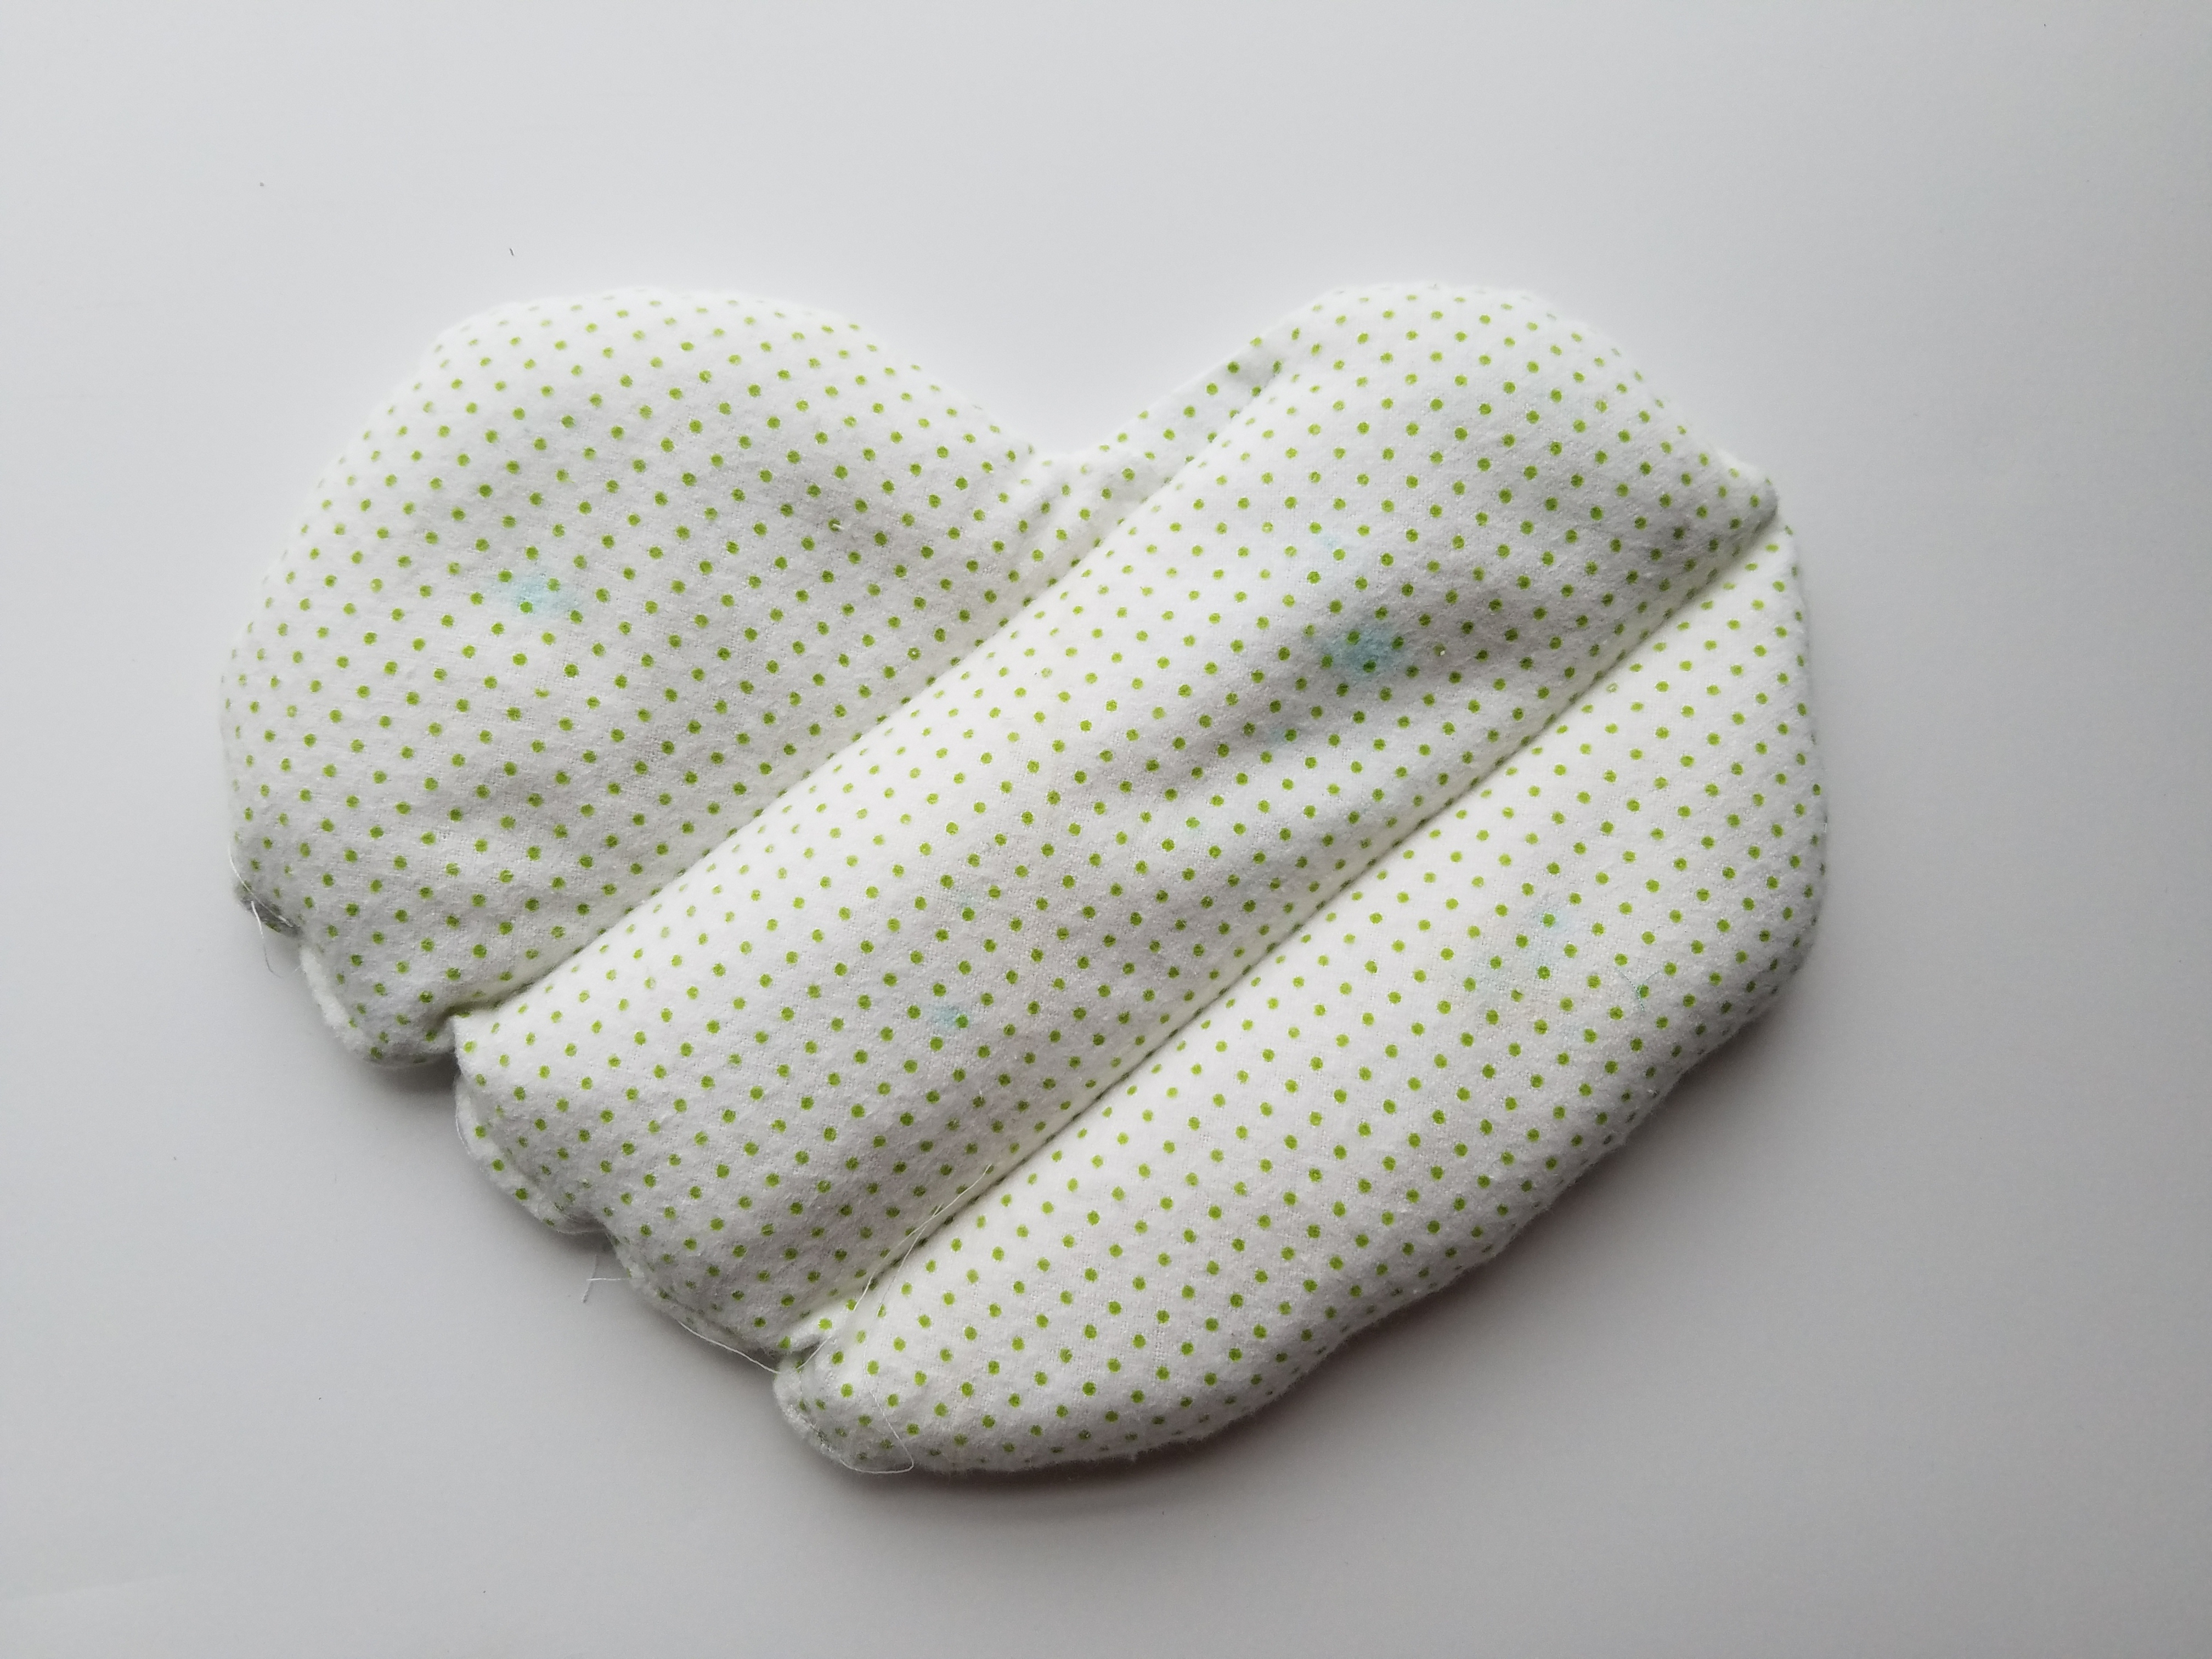
 I then made the heating pad. I laid out the heating pad cover on top of some flannel I had, tracing around with a pen. I then folded over the flannel (right sides together) and ironed it lightly to make sure the fabric was all together and cut it out. You could pin it together but I just held it with my fingers and kept the edges lined up and sewed around the edge leaving a 4″ gap on one of the straight sides. Then I flipped it right side out and ironed it and sewed two random lines to make “chambers” for the rice to stay in place (make sure your lines are sewn so that you can still pour rice into them!). Before I poured in the rice I prepared the edge with the opening by folding the fabric in and pressing it together to be even and then ironing that so it would already be set up for sewing it after I put in the rice. I then filled the heart with rice (I did first mix the rice with a bit of lavender essential oil since I had some) and sewed the open edge. The heating pad was done!
 When I put the heating pad in the cover I decided I wanted to secure it a bit more (might have been ok if I had made the envelope closure a bit better but I didn’t have enough fabric to do that) so I added velcro. Just sewed it on the inside top and bottom of the envelope closure and was all done!